移除 Windows 应用的程序包的安装限制
前言
如 Apple Music,把安装的版本限制在 Windows 11 22621.0 以上

而在低于 Windows 11 22621.0 的系统则会无法安装该软件

下载包
详情请参阅:获取微软商店应用的安装包
修改包
解压
使用 7-Zip 等解压缩软件打开应用包,并将其全部解压到空白文件夹内(因为不再将其打包成应用程序包,故不能再移动文件夹,文件夹名称要求只有英文,数字,和下划线组合)
找包
如果你下载的是 .AppX 或 .MSIX,则不需要看此部分,请转到:获取 Windows 内部版本号
如果你下载的是 .AppXBundle 或 .MSIXBundle,这是一个捆绑包,内含多个架构的包,必包含 x64,包含 ARM、ARM64 和 x86 的其中之一,或部分,或全部
若你不知道你的 Windows 架构,请参阅:检查 CPU 与 Windows 的架构
找到匹配你 Windows 架构的包,并将其再次全部解压到空白文件夹内(因为不再将其打包成应用程序包,故不能再移动文件夹,文件夹名称要求只有英文,数字,和下划线组合)

获取 Windows 内部版本号
按下 WIN + R 以打开“运行”,输入 winver.exe 并按下 Enter 以回车来打开“关于‘Windows’”
- 在“Microsoft Windows”的下一行,“版本 xxxx (OS 内部版本 xxxxx.xxxx)”即为你的 Windows 内部版本号总览
- “OS 内部版本”后面前半部分是你的 Windows 主要版本号(如
28000.1前面的28000)

修改应用程序包清单
使用记事本或其他文本编辑工具打开文件夹内的 AppxManifest.xml
按下 Ctrl + F 以打开“搜索”,并输入 TargetDeviceFamily,将所有结果里,引号(")内的版本号更改为你 Windows 主要版本号并保存
只需要更改 TargetDeviceFamily 那一行里,MinVersion="10.0. 和 MaxVersionTested="10.0. 之后的数字:
- 如
MinVersion="10.0.28000.0"和MaxVersionTested="10.0.28000.0"修改为MinVersion="10.0.19041.0"和MaxVersionTested="10.0.19041.0" - 对于部分
AppxManifest.xml,可能有多个TargetDeviceFamily,如TargetDeviceFamily Name="Windows.Universal"和TargetDeviceFamily Name="Windows.Desktop"并存,这种情况下最好两个都修改
再将目录里 AppxMetadata 文件夹、[Content_Types].xml、AppxBlockMap.xml 和 AppxSignature.p7x 文件给删除

如果实在不知道改什么
直接把这一段复制粘贴替换过去
1 | <TargetDeviceFamily Name="Windows.Desktop" MinVersion="10.0.0.0" MaxVersionTested="10.0.0.0" /> |
如果不是普通的 Windows 设备应该是
1 | <TargetDeviceFamily Name="Windows.Universal" MinVersion="10.0.0.0" MaxVersionTested="10.0.0.0" /> |
安装应用包
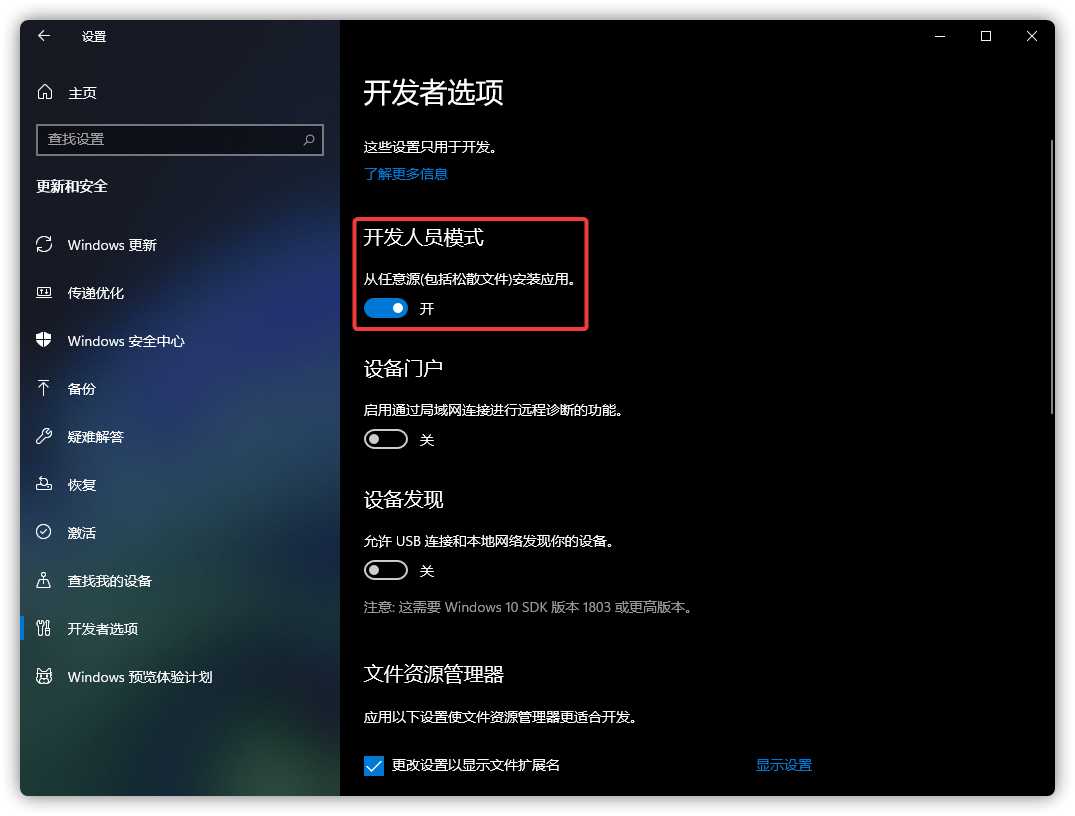
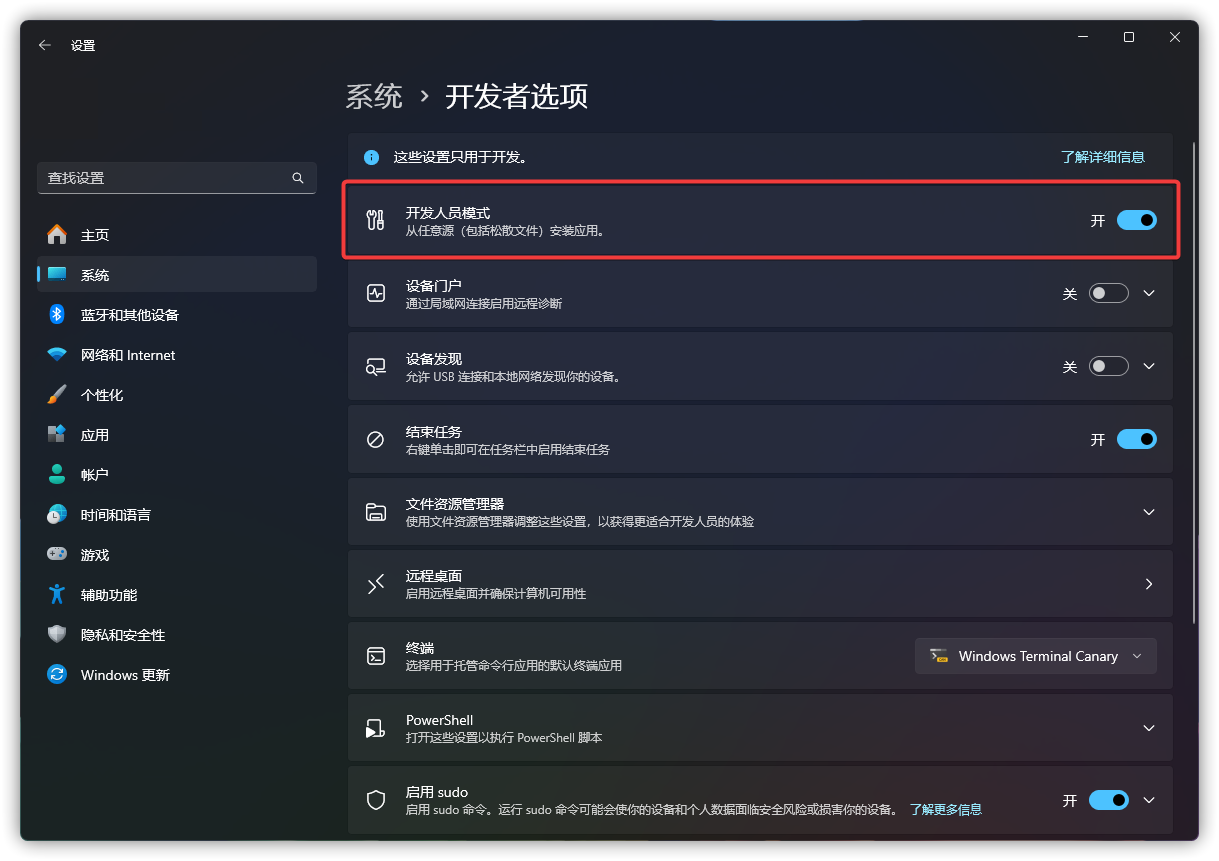
在 Windows 设置中打开开发人员模式
如何开启开发人员模式
Windows 10:
- Windows 设置 > 更新和安全 > 开发者选项
Windows 11:
- Windows 设置 > 隐私和安全性 > 开发者选项
- Windows 设置 > 系统 > 开发者选项
- Windows 设置 > 系统 > 高级
所有的操作都需要管理员身份,执行前请二选一执行以下操作:
- 按下 WIN + X 以打开“高级菜单”,选择“终端管理员”,“Windows PowerShell (管理员)”或“命令提示符(管理员)”
- 按下 WIN + Q 或 WIN + S 以打开“Windows 搜索”,输入
wt.exe(终端)、cmd.exe(命令提示符)或powershell.exe(Windows PowerShell),选择最佳匹配结果并点击“以管理员身份运行”
需要确保终端运行的 Shell 为 Windows PowerShell 或 PowerShell,如果运行的是 CMD(命令提示符),请输入 powershell.exe 以启动 Windows PowerShell
1 | cd "<AppxManifest.xml 所在路径>" |
在文件资源管理器顶部的地址栏中复制文件夹地址

比如我的路径在 C:\Program Files\AM 则命令为
1 | cd "C:\Program Files\AM" |
输入以下命令并回车以安装应用包
1 | Add-AppxPackage -Register ".\AppxManifest.xml" |

如果没有缺少相对应的软件运行库,则只需几秒钟即可完成安装

一般来说 Windows 10 2004 以上都可以正常运行

后记
- 关于
TargetDeviceFamily,请参阅 TargetDeviceFamily (Windows 10) - Windows UWP application | Microsoft Learn - Windows 10 及以上正式版内核版本号:
Windows 10 1507 > 10240
Windows 10 1511 > 10586
Windows 10 1607 > 14393
Windows 10 1703 > 15063
Windows 10 1709 > 16299
Windows 10 1803 > 17134
Windows 10 1809/Windows 10 LTSC 2019/Windows 10 神州网信政府版 2019 > 17763
Windows 10 1903 > 18362
Windows 10 1909 > 18363
Windows 10 2004 > 19041
Windows 10 20H2 > 19042
Windows 10 21H1 > 19043
Windows 10 21H2/Windows 10 LTSC 2021/Windows 10 IoT LTSC 2021/Windows 10 神州网信政府版 2021 > 19044
Windows 10 22H2 > 19045Windows 11 21H2 > 22000
Windows 11 22H2 > 22621
Windows 11 23H2 > 22631
Windows 11 24H2/Windows 11 LTSC 2024/Windows 11 IoT LTSC 2024 > 26100
Windows 11 25H2 > 26220
Windows 11 26H1 > 28000
Windows 11 26H2 > 26300